
Ortographic Projection is a technique to express 3D objects as 2D. To draw an ortographic set of an object, you think like you put this object in a transparent cube. And reflect all the surfaces directly. This is called The Glass – Box Approach. Then here is the drawing set which shows how your object looks like.

We have been working on Ortographic Drawing for three weeks and we got a Midterm about it. I will share my two ortographic drawing examples below.
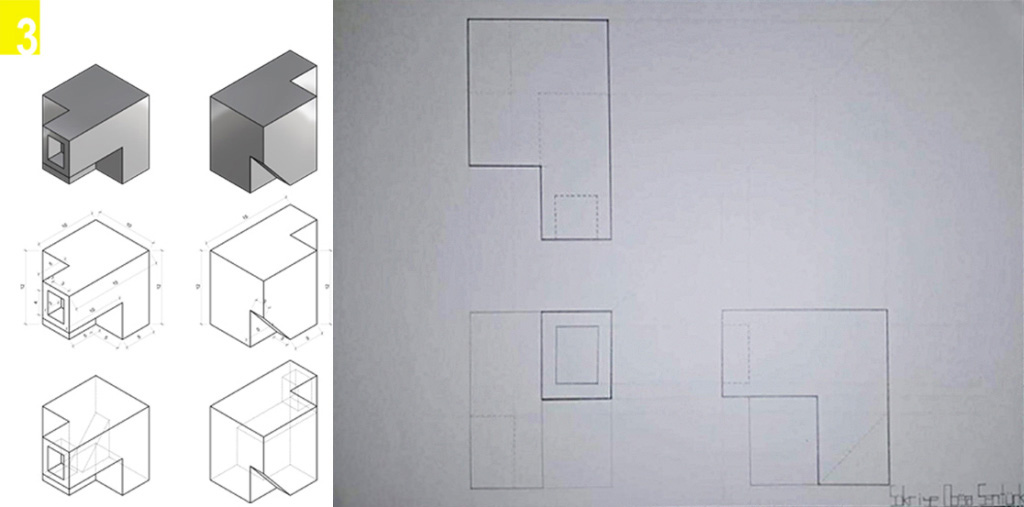

Maybe it looks easy. But there are lots of challenges while applying the projection. First of all, arranging the paper is really hard for me. When it finish, margins have to be same. After that you imagine all parts you will draw and most important part is (at the same time most difficult for me) being really careful. If you miss a measurement, all drawing is wrong ( as I did in Midterm 1). Also you mustn’t forget to show any part. Because it means this part is not there, your geometry is wrong.
As you see, to express what is going on front and behind the surface we see, line qualities are used. To tell which part is closer to glass – box surface which used to reflect the side of the object, darker lines are used. When the part you draw move away, line colour gets lighter. Dashed lines are used to show the ares behind the surface we see. Being careful about the quality is important. Lines have to be really clear and a whole. If there are end to end lines (like corners) or one line intersects other and stops on it, these two lines must come together really clear. Because if a line is just little bit longer than it been on your object, this line expresses a longer part there. This is a wrong expression.
Reference lines are really important too. Measurement and rules may be unreliable. But reference lines are certain things. After drawing top view, reference lines are being started to use second and third parts. After drawing second part, a 45-degree line comes in order to reflect the side view. And you draw third part.
If drawing is completed, writing session comes. Writings are on the paper too, so they have to be arranged like drawing. Using ruler is the most effective way to do that.
Producing ortographic drawing is an operation I really like and enjoy. I like the process and seeing the result after your effort.
